Unboxing your Yale Assure Lock 2 is a breeze, and it really sets the stage for an easy setup. As you open the box, you’ll find the lock itself snugly packed along with a few handy items. You’ll get the mounting plate, screws, and, of course, the user manual that’ll guide you through the entire process. Don’t forget the all-important backup key!
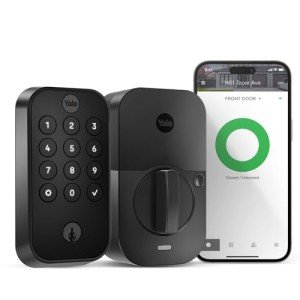
Yale Assure 2 Smart Lock with Wi-Fi Keypad
Upgrade your home security with this smart lock that offers convenience and peace of mind at your fingertips
Product information
SGD 330.63 SGD 252.99
Product Review Score
4.4 out of 5 stars
17 reviewsProduct links
Once you’ve got everything out, take a moment to appreciate the sleek design of the Yale Assure Lock 2. It’s modern and elegant, making it a stylish addition to any door. Plus, the keypad is big enough for easy use, even when you're juggling your groceries or rushing into the house.
Before you dive into the installation, it’s a good idea to check the batteries. Your Yale Assure Lock 2 usually comes with the batteries included, so make sure they’re fresh and ready to go. This lock runs on battery power, so verifying this step ensures that you won’t run into any surprises later. Once that’s all set, you're one step closer to secure and keyless entry!
Installing the Yale Assure Lock 2 is pretty straightforward. Just follow the instructions provided. If you have a standard door with a single deadbolt, you’ll be done in no time! With the right tools, you’ll have your new lock mounted and ready to go, combining security with convenience in just a few minutes.
Gather Your Tools for Installation
Getting ready to install your Yale Assure Lock 2? Awesome! Before diving into the setup, it's smart to gather all the tools you’ll need. This way, you can breeze through the process without any interruptions. Here’s a quick checklist to help you out:
- Screwdriver: A Phillips head screwdriver is your best friend here. It’s essential for securing the lock in place.
- Level: This will help ensure your Yale Assure Lock 2 sits straight. A level lock not only looks better but also functions better.
- Tape Measure: Make sure you’ve got the right measurements. A tape measure will come in handy for aligning everything perfectly.
- Drill (if needed): If you’re replacing an old lock, a drill might be necessary to make new holes. Make sure to have the right drill bits on hand.
- Marker: A simple marker can be used to mark where the lock will go, making it easier to drill and install.
Having these tools on hand will keep things smooth sailing during the installation of your Yale Assure Lock 2. Take your time, follow the instructions, and soon you’ll have your new lock up and running! Happy installing!
Step by Step Setup Guide
Setting up your Yale Assure Lock 2 Keypad is a breeze. Here's a step-by-step guide to get you started quickly and easily.
Step 1: Gather Your Tools
- Yale Assure Lock 2 Keypad
- Phillips screwdriver
- Fresh batteries (usually included)
- Your phone (for app setup, if desired)
Step 2: Install the Lock
First off, remove your old lock if you have one. Follow these simple steps:
- Unscrew the existing lock from the door.
- Insert the Yale Assure Lock 2 in the door hole.
- Secure it with the screws provided.
Step 3: Put in the Batteries
Next, take the batteries and insert them into the back of the keypad. Make sure they’re fitted correctly – the plus and minus signs are your guides.
Step 4: Program Your Keypad
Now for the fun part! You can set up your access codes:
- Press the Yale button to wake up the lock.
- Enter the default code (usually found in the manual).
- Follow the prompts to create your new codes!
Step 5: Test the Lock
Finally, give everything a test run. Lock and unlock the door using your new code to ensure everything works smoothly. You might want to download the Yale app on your phone for further enhancements! With this guide, your Yale Assure Lock 2 is ready to keep your home safe and sound!
Troubleshooting Common Installation Issues
Installing your Yale Assure Lock 2 Keypad is usually a breeze, but sometimes things don’t go as planned. Here are some common issues you might run into and how to tackle them easily.
1. The Lock Doesn’t Respond
If your Yale Assure Lock 2 isn’t responding, it could be a power issue. Check the batteries first! Make sure they’re installed correctly and have enough juice. If the batteries are new and it’s still unresponsive, try resetting the lock by removing the batteries, waiting a minute, and putting them back in.
2. Trouble Connecting to Your Smart Home System
When you're trying to connect your Yale Assure Lock 2 to your smart home hub, make sure your Wi-Fi is strong. If the connection isn’t successful, moving your hub closer to the lock can help. Also, double-check that the app you're using is updated and that you’ve followed the pairing steps accurately.
3. Keypad Not Working
If the keypad on your Yale Assure Lock 2 isn’t responding, ensure it's clean and free from any debris. Sometimes dirt can interfere with the sensor. If that’s not it, performing a soft reset can often do the trick. Simply remove the back cover, take out the batteries, and then put them back in after a moment.
Don’t let small hiccups ruin your experience! Most issues have simple fixes, and you can enjoy the peace of mind that comes with your Yale Assure Lock 2.